Rainbow Baking Soda and Vinegar Experiment
 |
| I was inspired by this mom's blog |
You will need: vinegar; baking soda; food coloring; syringes or eye droppers; a cookie sheet or cake pan; mixing bowl and spoon
The most time intensive is dying the baking soda but you probably have an eager helper to join you in the process! Be sure to talk about ROY-G-BIV (each successive color of the rainbow.)
To dye the baking soda:
1. scoop 4 big spoonfuls of baking soda in the bowl
2. add 2-3 drops of food coloring
3. moisten with a teaspoon or two of water
4. mix (it will be clumpy but should not be wet)
Arrange the colored baking soda, side by side in your pan. Then fill a syringe or eye dropper with vinegar and let your little one squeeze it onto the baking soda to see the reaction! As a grand finale, pour your entire cup of vinegar over the top of the rainbow :)
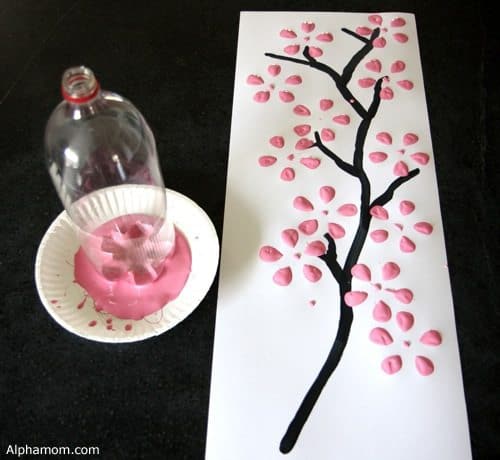
Blooming Flowers with Re-used Water Bottles
These kind of paint-stamping activities are easy and have a cute effect. I also like the idea of using an item from our recycling bin to make artwork! With all the seltzer water I drink, we always have an empty bottle handy. To enhance the fine motor component, have your child dip the cap in yellow paint to make the center of each flower. This project would also be a nice gift for a grandparent or elderly neighbor.
 |
| photo |
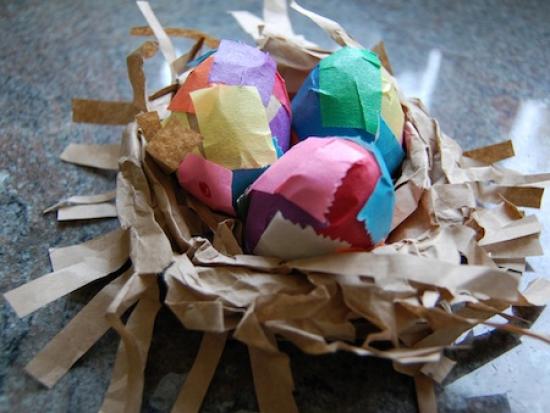
We have been so lucky at our house to have bird's visibly nesting two springs in a row! Last year, a Cardinal made her nest in the holly bush in the front of our house and this year we have five bright blue Robin's eggs in a boxwood in our backyard. I've always found it fascinating the way birds can make such beautiful, perfectly shaped nests from materials in their natural environment. Here is an activity for your little one to make his or her own work of art:
1. Take a brown paper lunch bag and cut about 4 inches off the top while the bag is still flat.
2. Then, depending on the age of your child, have him or her cut slits down toward the bottom of the bag (about 2 or 3 inches deep.)
3. Repeat this this with a second paper bag, then open the bags and place one inside the other.
4. Have your child scrunch or twist the fringed ends and voila!
5. To make eggs for the inside, either cut and paint a portion of a cardboard egg carton or take some extra plastic Easter eggs and cover them in masking tape or craft tape. My daughter loves sticking tape on anything!
 |
| photo |
About the author:
Liza d'Hemecourt is the blog coordinator for Parent Talk. She lives in Needham with her husband and her two and three year old son and daughter. Prior to motherhood, she taught kindergarten and first grade.

No comments:
Post a Comment
We appreciate your comments! If you have any questions about making comments here, please visit our Rules of Engagement page.